Henna Brows Tutorial : Professional Guide for Perfect Results
Share
Step 1 — Preparation
Prepare your workspace
Henna powder can create dust; if it lands on your furniture or floor, it will oxidise and leave stains that are difficult to remove. Make sure the area where you're preparing the henna in your mixing bowl is well covered. Use plastic gloves and an apron to avoid getting dye on your hands and clothing.
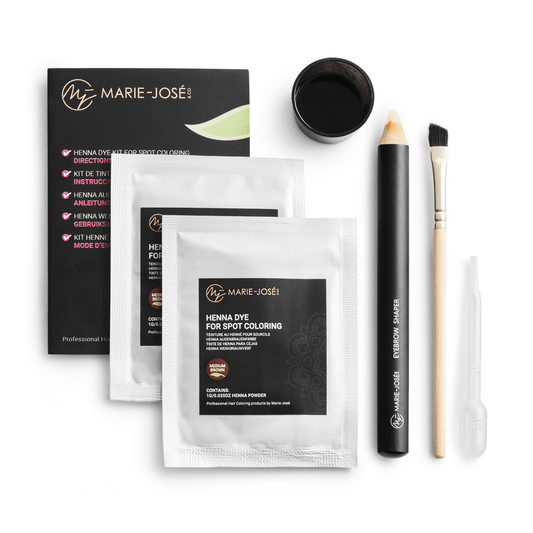
Have everything you need ready before you start so you don't have to search during the treatment.
Do a patch test
Marie-José eyebrow dye is based on henna. Colour pigments are added to achieve shades from light to dark brown. Some people can react allergically to these pigments, which are present in all hair colorants. A patch test is therefore essential.
48 hours before applying the dye to the eyebrows, test the product on the inside of the arm. Only proceed with the treatment if no allergic reaction has been detected.
Choose the right eyebrow dye colour
The right colour depends on hair colour, skin type and the desired effect. You can browse all available shades in the henna eyebrow tint collection. Below are some guidelines:
- Blonde — suitable for people with blonde, light brown or light grey eyebrows.
- Light Brown — a good choice for those who prefer a subtle result.
- Copper Brown — ideal for redheads, or to mix with Blonde or Brown shades for a warmer tone.
- Medium Brown — a safe, versatile choice for most clients.
- Chestnut Brown — warm, reddish undertones. Add a pinch to any colour to make it warmer.
- Dark Brown — the most popular shade; gives full, defined brows.
- Grey-Brown — mixed with Light or Dark Brown for a cool result; with Blonde or Medium Brown for a warm effect.
- Black — primarily suitable for clients with dark skin.
By adjusting the processing time you can also influence how dark the final result is. For a full overview of all shades, visit the henna eyebrow tint collection. To learn how to combine shades for a custom result, read The Art of Mixing Eyebrow Henna Colours.
Step 2 — Cleansing & Styling
Cleanse with Purifying Foam
Just as you use a special shampoo for colour-treated hair, the same principle applies to eyebrows. Purifying Foam softens the brow hairs and helps prolong colour retention on the skin.
Shape the eyebrows
The shape of the brows has a direct impact on the final result. After cleansing, pluck, thread or wax the eyebrows to achieve the desired shape before applying any product.
Remove dead skin cells and degrease
Apply eyebrow scrub and massage it onto the brows for about one minute, then remove with a damp pad. Follow with enzymatic eyebrow peeling to dissolve any remaining dead skin cells. After approximately two minutes, remove the peeling.
Finish by thoroughly cleansing the eyebrows with alcohol. This optimises degreasing of both the skin and the brow hairs. Dye adheres less well to naturally oily skin — see also the oily skin protocol for additional steps.
Step 3 — Mapping & Covering
Brow mapping
Precise brow mapping is a crucial step for perfectly shaped results. Use a brow mapping string or pencil to define and outline the desired shape based on the client's facial features and preferences.
Mark the three key points: the starting point (inner corner), the arch (highest point) and the tail (outer corner). Check symmetry between both brows before moving on.
Protect the skin
Apply a barrier around the mapped brow shape using brow contour paste or a skin-safe highlighting pen. This keeps lines clean and prevents dye from staining areas outside the shape.
Use an angled brush or cotton swab to apply the paste. Make sure the skin is fully covered. Take care not to get paste on the brow hairs or the skin underneath them — paste in those areas will prevent the dye from adhering.
Step 4 — Dyeing & Touch-ups
Mix the henna powder with rose water
Place a small amount of henna powder in a small plastic or glass bowl — do not use a metal bowl, as metal can affect the formula. Add a few drops of rose water using a dropper and mix until a smooth, thick paste forms.
Allow 2 to 5 minutes for the powder to dissolve fully. If the paste is too thin or the powder hasn't dissolved properly, the result may appear yellow or green. Small globules in the paste are normal and do not need to dissolve.
Apply the dye and manage exposure time
Apply the paste in a thick, even layer using an angled brush. Start at the tail and work towards the base. Press and stamp the paste into the skin as you go to ensure full coverage.
Towards the base, apply a slightly thinner layer if you want a natural ombré effect — this is the classic Ombré technique. Make sure the entire brow and the skin beneath it are covered.
Allow the dye to process for 15 to 20 minutes. The longer the exposure time, the darker the result. For an ombré effect, remove the dye from the base after 5 to 10 minutes. If you're unsure whether the base is dark enough, remove a small amount and check — if it's still too light, reapply and leave it a little longer.
Good to know
Note down the colour, mixing ratio and processing time for each new client. At the next appointment you start with the right settings immediately and deliver a consistent result without having to test again.
Remove the dye and correct any stains
Remove the henna paste with a clean, dry cotton ball. Use a cotton swab to wipe away any excess dye that strayed outside the brow shape during application.
If the result is slightly too dark or there are unwanted stains around the brows, use a tint remover to correct. Avoid oil-based cleansing products at this stage.
Step 5 — Aftercare
Give the client clear aftercare advice
To maintain the henna effect as long as possible, share the following instructions with your client:
- Keep the eyebrows dry for the first 12 hours — avoid showering, swimming or sauna. This allows the henna to bond fully with the skin.
- Avoid eyebrow makeup, face cream, oil-based cleansing products, scrub cream or face masks on the brow area.
After 1 to 2 weeks, the client can touch up the eyebrows with eyebrow powder. You may also suggest they take home Purifying Foam and eyebrow gel to maintain results between appointments.
Store opened henna sachets carefully
An opened sachet stays usable for up to two weeks, provided it is tightly resealed and stored in a dark, dry place.
Frequently asked questions
Can I apply henna brows without prior training?
Yes. Marie-José products are designed to be used straight away. Read this guide carefully, follow the steps and you'll have everything you need. No formal course is required.
What if the result is too light?
This almost always comes down to processing time or layer thickness — not the product. Read the guide on processing time and layer thickness to find out how to adjust.
My client has oily skin — anything different?
Yes. Oily skin absorbs less pigment, which affects the result. Follow the steps in the oily skin protocol for best results.
How do I mix custom colours?
The henna and hybrid brows ranges both offer multiple shades that can be combined. Read The Art of Mixing Eyebrow Henna Colours for a full guide on colour matching.
Ready to get started?
Browse the full Marie-José range and choose the shades that suit your clients.
Browse henna & hybrid brows